Last summer, my husband surprised me with a visit to The Fergus Scottish Festival. I didn’t know where we were heading until we pulled into a dusty field, which doubled as a parking lot, that the most Scottish experience this side of the Atlantic was our destination. If I had known, I would have cleared my schedule for the entire weekend and made sure we were there to enjoy every caber toss, every raised glass of whiskey, and every kilted wonder that passed through the admission gates. As it was, I enjoyed a single afternoon and evening watching the calling of the clans, listening to some drum and pipe bands, and visiting the vendors’ stalls. I may have spent time appraising the leg game the kilted men had going on, but that’s another story for another time.
See? The leg game is strong with these lads, but that’s not why we’re here. (It’s totally why we’re here.)
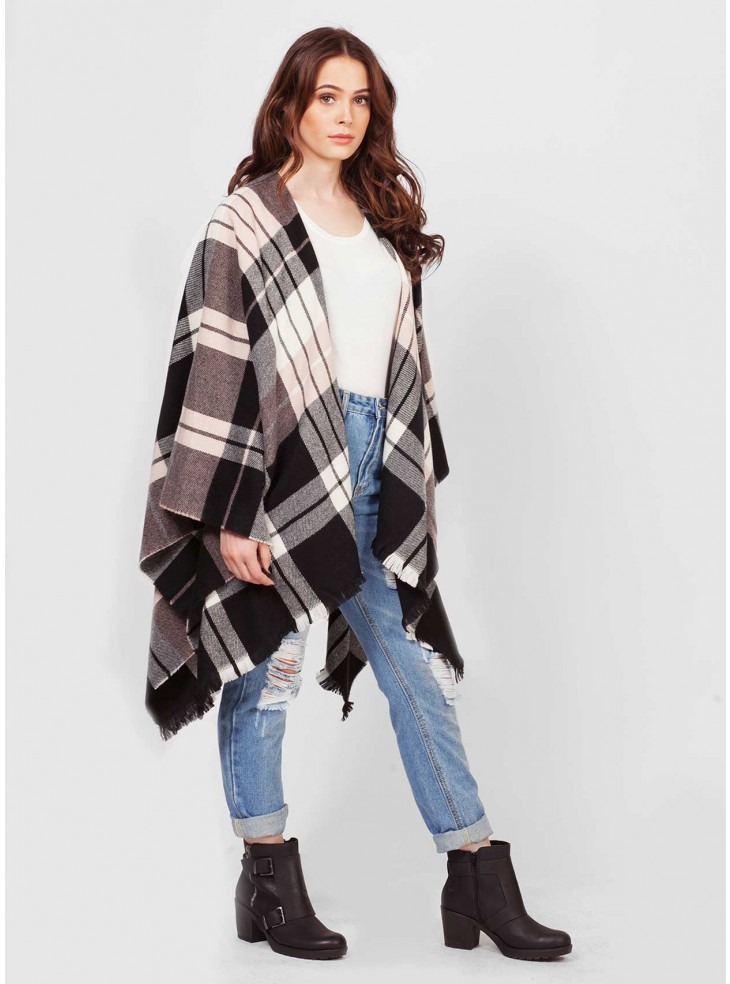
I knew my wallet was going to take a hit the moment I saw the first vendor’s booth. I spotted a rack of woolen shawls in some of the prettiest tartans around. I bought a LochCarron of Scotland serape in a beautiful Stewart Eve plaid on a whim. It cost me $160.00, which seemed a bit much for a rectangle of fabric with half a long oval cut out of it. Still, with that purchase I not only had a cozy shawl, I also had a pattern for as many other shawls I could make. When my local fabric store had a big blowout sale after Christmas, I scooped up a couple of meters of a wool blend coat fabric and got to work. Now you too can make your own Scottish serape shawl at home to keep you warm and dreaming of men in kilts.
Not everyone has a shawl they can use as a pattern, but I have another way to share my serape love with you. Because the pattern is so basic, it’s easy to make your own paper pattern for this, all you need are the measurements. It’s simple!
Super Easy DIY Scottish Serape Shawl
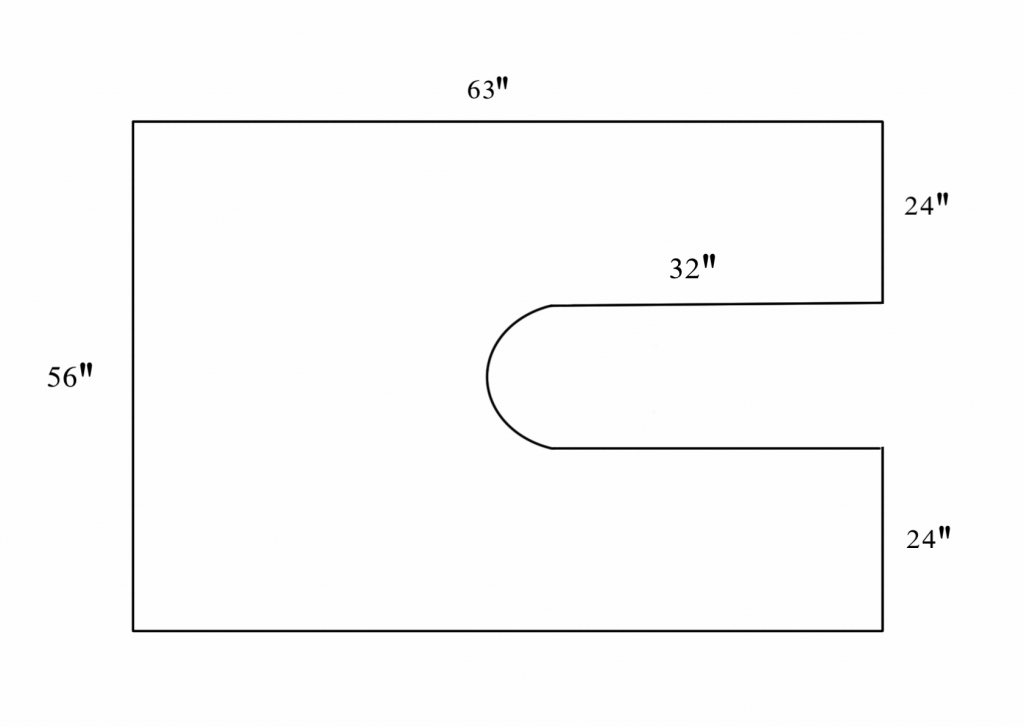
You can make this pattern out of tissue paper taped together or a roll of kid’s craft paper works too. Start with a 63″ by 56″ rectangle of paper and follow these two steps:
- On the short side (the 56″ side) measure in 24″ from both ends and mark with a pencil.
- From the 24″ marks, cut in about 30″ in a straight line, then round your cuts inward until they meet in the middle. The long oval you cut out of the fabric should be about 32″ long from the edge to the top of the oval.
Your pattern will look something like this:

Now it’s time to go ahead and cut your fabric.
- Pin the pattern to the shawl fabric and cut around the pattern. Depending on how you want to finish your edge, use pinking shears for this step.
- Finish your edges however you see fit. A few popular options include a rolled hem, bias tape, zig zag stitch, blanket stitch, attach decorative trim, or leave it raw edged.
I’ll be heading back to Fergus this summer and I can’t wait to see what other inspirations will be on display, like cable knit sweaters, celtic jewelry, and . . . legs.
Image source: Snowballs, loveclothing.com


 Food Photography Tips and Tricks – Say Cheese!
Eileen MacDougall
Hello Kelly. Thank you so much for sharing your simple shawl pattern. Our adult Granddaughter is smitten by black and red tartan and has asked me to make her a shawl of one and if I measure twice and cut once with your pattern I think I’ll be able to do it. ? !